Unlocking the Secret to Simple Homemade Focaccia: Your Easy 4-Hour Recipe Awaits
Imagine pulling a warm, aromatic loaf of focaccia straight from your oven, its golden crust glistening with olive oil, promising a tender, airy crumb within. Sounds like a daunting task reserved for seasoned bakers, right? Think again! We're here to demystify the art of bread making with an incredibly **easy homemade focaccia** recipe that delivers spectacular results in under four hours, even if you’ve never worked with yeast before. This isn't just another bread recipe; it's a culinary revelation. Tested countless times to ensure the perfect flour-to-water ratio and a foolproof process, this focaccia is designed for consistent excellence. It’s the kind of bread that disappears in minutes at any gathering, a testament to its irresistible flavor and texture. Forget complicated kneading or specialized equipment; all you need is a bowl, a spoon, and a little patience as your dough effortlessly develops its magical, bubbly structure. Get ready to master the art of Easy No-Knead Focaccia: A Same-Day Recipe for Beginners, and impress everyone (including yourself!) with this simple yet sublime creation.Why This Is Your Go-To Easy Homemade Focaccia Recipe
This recipe stands out from the crowd for several compelling reasons, making it an absolute must-try for both novice and experienced bakers seeking delicious simplicity.- Same-Day Delight: Unlike many bread recipes that demand overnight proofing, this **easy homemade focaccia** can be mixed, risen, and baked within a single afternoon. Its no-knead dough quickly builds a beautiful, bubbly structure through short, strategic resting periods, meaning you can satisfy your focaccia craving without the wait.
- Perfect for Beginners: Seriously, zero yeast bread experience required. If you can stir ingredients in a bowl, you can make this focaccia. We’ll guide you through every step, demystifying the process and building your confidence.
- No Special Equipment Needed: Forget stand mixers, dough hooks, or fancy bread machines. This recipe relies on nothing more than a large bowl, a spoon, and your hands for a few quick stretch-and-folds. It’s accessible to every kitchen.
- Mostly Hands-Off: While there are a few essential interactions – quick stretch-and-folds and the satisfying dimpling – the majority of the time the dough is fermenting and developing flavor all on its own. This makes it ideal for busy schedules or relaxed weekends.
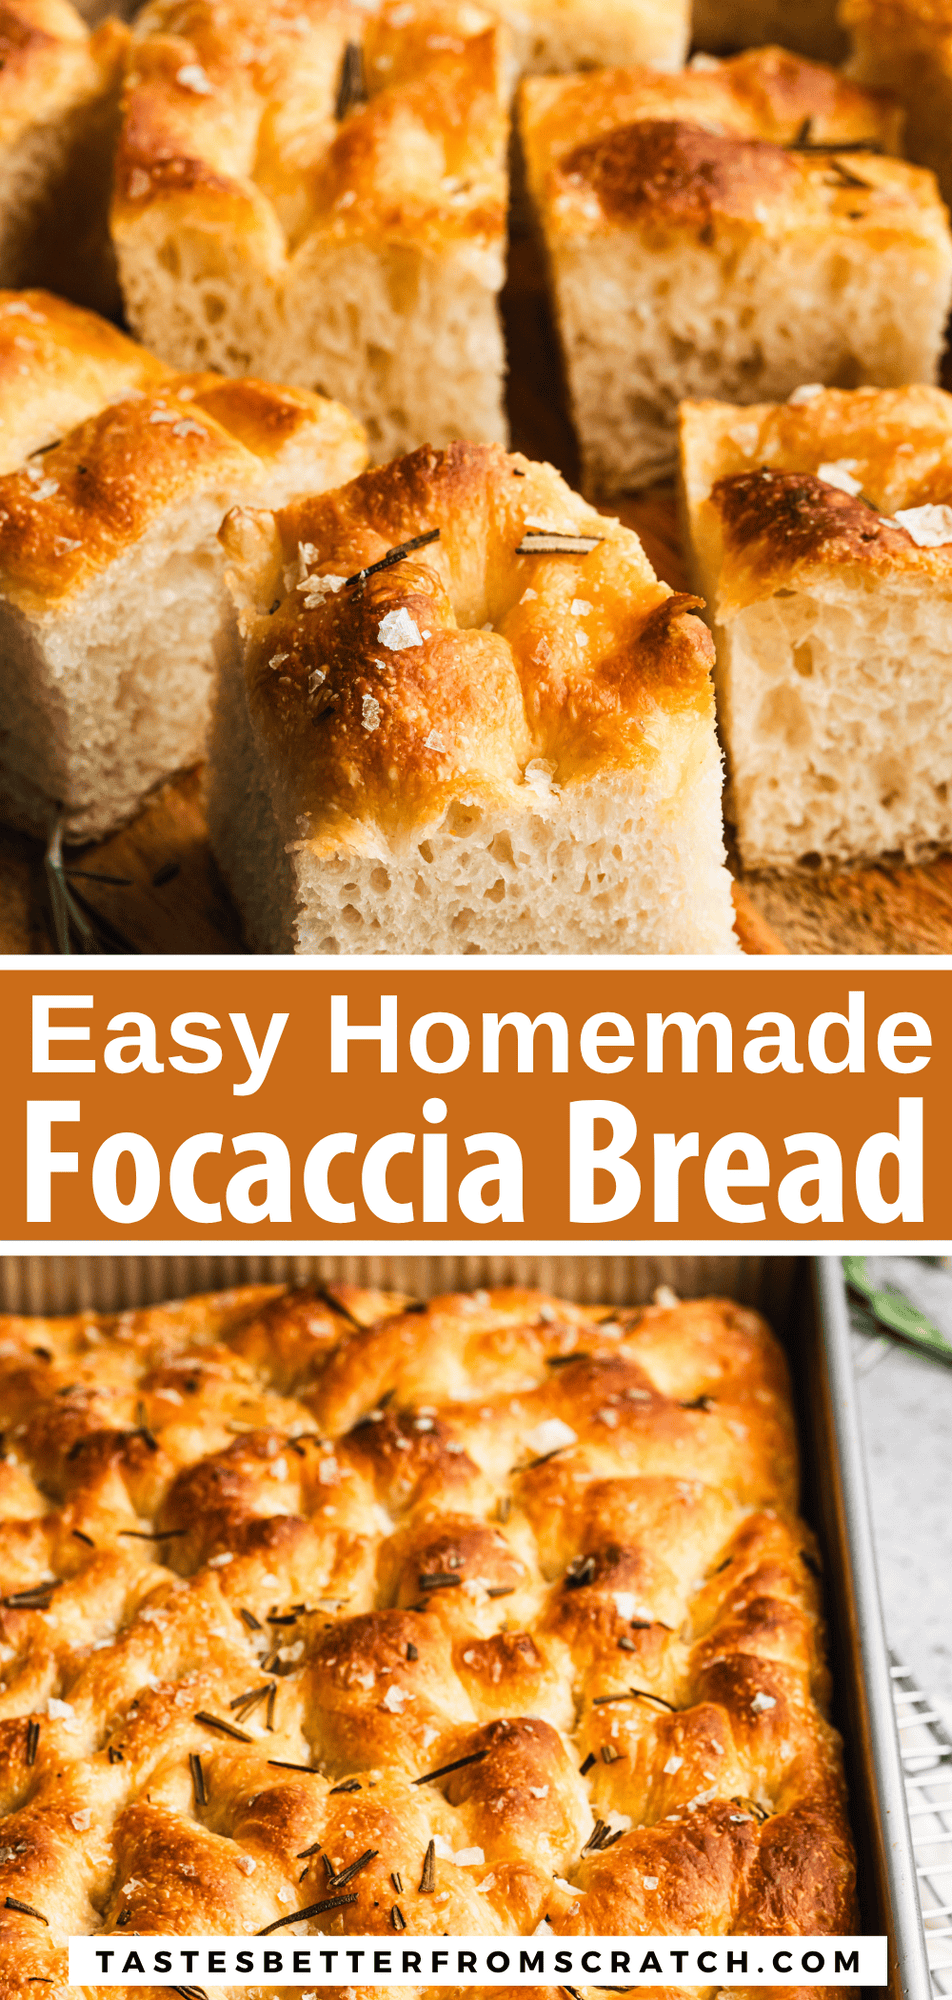
- Fluffy Inside, Golden Crust: Thanks to a generous amount of olive oil, ample rising time, and a straightforward baking method, you'll achieve a focaccia with a perfectly crisp, golden-brown bottom and a remarkably pillowy, tender crumb.
- Endlessly Customizable: This focaccia is your blank canvas. While divine on its own, it’s also begging for your favorite toppings. From classic rosemary and flaky sea salt to vibrant olives, sun-dried tomatoes, or even sweet options, the possibilities are limitless.
Essential Ingredients for Your Perfect Focaccia
Creating truly exceptional **easy homemade focaccia** starts with understanding the role of each ingredient. The beauty of this recipe lies in its simplicity, utilizing basic pantry staples to achieve extraordinary results.- All-Purpose Flour: This forms the foundational structure of your dough. While you *can* use bread flour for a slightly chewier texture, good old all-purpose flour works wonderfully, providing the perfect balance of structure and tenderness. For best results, measure your flour by weight (grams) if possible, as volume measurements can vary wildly.
- Water: The lifeblood of your dough, water activates the yeast and hydrates the flour. Aim for a temperature around 105-115°F (40-46°C). Too cold, and the yeast will be sluggish; too hot, and it could kill the yeast. A simple kitchen thermometer is a helpful tool here, though you can often gauge it as comfortably warm but not hot to the touch.
- Yeast (Active Dry or Instant): The magic behind the rise!
- Active Dry Yeast: This type needs to be "bloomed" first. Mix it with your warm water and a pinch of sugar (optional, but helps activate it) and let it sit for about 5 minutes until foamy. This confirms your yeast is alive and active.
- Instant Yeast: The ultimate convenience. It can be stirred directly into your warm water (or even straight into the dry ingredients, though mixing with water first is safer for beginners). No blooming required.
- Sea Salt: More than just a flavor enhancer, salt plays a crucial role in regulating yeast activity and strengthening the gluten network in your dough, contributing to that perfect chew. Use a good quality sea salt for the best flavor.
- Extra Virgin Olive Oil: This is a star player in focaccia! It adds richness and a beautiful depth of flavor to the dough, prevents sticking, and, most importantly, helps create that coveted crisp, golden crust when drizzled generously on the pan and the dough itself. Invest in an olive oil you genuinely enjoy the taste of – it doesn't need to be expensive, just flavorful. You can even infuse it with garlic or herbs for an extra layer of taste.
- Optional Toppings: This is where your creativity shines!
- Classic: Fresh rosemary, thyme, coarse flaky sea salt.
- Savory: Olives (Kalamata, Castelvetrano), cherry tomatoes (halved), caramelized onions, thinly sliced garlic, grated Parmesan cheese, black pepper, chili flakes.
- Unique: Pesto swirls, roasted red peppers, sun-dried tomatoes, thinly sliced potatoes.
Step-by-Step Guide to Mastering Your Easy Focaccia
Ready to turn those simple ingredients into a masterpiece? Follow these steps for the perfect **easy homemade focaccia**.1. Prepare Your Yeast Water
If using active dry yeast, combine it with your 105-115°F (40-46°C) water in a large bowl. Let it sit for 5-10 minutes until a foamy layer appears on top. This indicates your yeast is active and ready. If it doesn't foam, your yeast might be old, or the water temperature was off, and it's best to start with a fresh batch.
If using instant yeast, simply stir it into the warm water and you can proceed immediately to the next step.
2. Mix the Dough
To the yeast water, add the all-purpose flour, sea salt, and about half of your extra virgin olive oil (around 2 tablespoons). Using a sturdy spoon or spatula, stir vigorously until all the flour is hydrated and you have a shaggy, cohesive, and very sticky dough. Make sure there are no dry pockets of flour remaining at the bottom of the bowl – they can be surprisingly sneaky!
3. The First Rest & Stretch-and-Folds
Drizzle the remaining initial olive oil over the surface of the dough, cover the bowl tightly with plastic wrap or a clean kitchen towel, and let it rest at room temperature for 30 minutes. This initial rest allows the flour to fully hydrate and the gluten to begin relaxing.
After 30 minutes, perform your first "stretch-and-fold." Lightly oil your hands. Grab a portion of the dough from one side, stretch it upwards, and fold it over to the center. Rotate the bowl a quarter turn and repeat this process 3-4 times, until you've stretched and folded all sides. The dough will be sticky, but resist the urge to add more flour. Repeat this stretch-and-fold process every 30-45 minutes for a total of 2-3 times. These short, gentle folds are crucial for developing the gluten structure in this no-knead dough, leading to that incredibly airy texture without heavy kneading. For a deeper dive into this technique, check out Bake Fluffy Focaccia Today: The Secret to No-Knead Deliciousness.
4. The Final Rise & Pan Prep
After your final stretch-and-fold, drizzle about 2-3 tablespoons of olive oil generously into the bottom of a 9x13 inch baking pan (or similar size). This helps create that irresistibly crisp bottom crust and prevents sticking. Gently transfer the dough into the oiled pan, turning it once to coat both sides in oil. Cover the pan loosely with plastic wrap or a towel and let it rise in a warm spot for 1-1.5 hours, or until it looks visibly puffy and has expanded by about 50%.
5. The Dimpling Magic
Once the dough has risen beautifully, remove the cover. Generously drizzle another 1-2 tablespoons of olive oil over the surface of the dough. Then, using your oiled fingertips, gently but firmly press them straight down into the dough, creating those characteristic dimples all over the surface. Don't be shy – press all the way to the bottom of the pan! This creates pockets for olive oil and toppings, and helps to prevent large air bubbles from forming during baking.
6. Topping & Baking
Sprinkle your chosen toppings evenly over the dimpled dough. Give it one last drizzle of olive oil, especially over any exposed areas, and a final sprinkle of flaky sea salt if desired.
Preheat your oven to 400°F (200°C). Bake the focaccia for 20-30 minutes, or until it's deeply golden brown on top and the edges are crisp. The exact time will depend on your oven and the thickness of your focaccia. Keep an eye on it in the last 5-10 minutes.
Tips for Focaccia Perfection & Endless Customization
Elevate your **easy homemade focaccia** from great to absolutely unforgettable with these insights and ideas:- Don't Fear the Stickiness: Focaccia dough is meant to be a high-hydration dough, which means it will be wet and sticky. Embrace it! Oiling your hands during stretch-and-folds and dimpling will prevent sticking better than adding more flour, which can make the focaccia tough.
- The Power of Quality Olive Oil: Since olive oil is such a prominent flavor, using a good quality extra virgin olive oil really makes a difference. You don't need the most expensive bottle, but choose one with a flavor profile you enjoy. For an extra layer of flavor, infuse your olive oil with smashed garlic cloves or fresh herbs (like rosemary or thyme) for an hour or two before using it.
- Temperature Matters: Beyond just the yeast water, ensuring your kitchen is a comfortably warm temperature (around 70-75°F or 21-24°C) will aid in efficient rising. If your kitchen is cool, find a warm spot like near a sunny window or in a slightly warm (but turned off!) oven.
- Listen to Your Dough, Not Just the Clock: While timings are provided, always remember that dough rising times are approximate. Humidity, temperature, and even the age of your yeast can affect how quickly your dough proofs. Look for visual cues: the dough should look puffy and expanded, and when you gently poke it, it should slowly spring back, leaving a slight indentation.
- Beyond Rosemary: Topping Ideas Galore:
- Mediterranean Medley: Halved cherry tomatoes, Kalamata olives, a sprinkle of oregano.
- Garlic & Herb: Thinly sliced garlic, fresh parsley, and a touch of red pepper flakes.
- Sweet & Savory: Thinly sliced red onion and crumbled goat cheese, perhaps a drizzle of balsamic glaze after baking.
- Seasonal Delights: In autumn, try thinly sliced apples with a sprinkle of thyme and sea salt. In spring, asparagus spears and shaved Parmesan.
- Serving Suggestions: Focaccia is incredibly versatile. Enjoy it warm with a dipping oil (or just more olive oil!), alongside a hearty soup or salad, as the base for open-faced sandwiches, or simply as a delicious snack.
- Storage Tips: Leftover focaccia is best stored at room temperature in an airtight container for 1-2 days. For longer storage, freeze individual slices wrapped tightly in plastic wrap, then foil. Reheat in a toaster oven or regular oven until warmed through and crisp.
